Showing posts with label how to. Show all posts

Thursday, October 27, 2016

Back to Basics: Sewing tips

So I have my first serger on the way and I am so excited to start working with it. I am no longer afraid to work with Rayon and linens because now I can properly overlock the edge and reduce fraying. In the meantime, I wanted to talk about some things I have learned over the last year of sewing. I want to preface by saying I have been sewing a year and I am self-taught so it's been a lot of trials and error. Any corrections or suggestions please leave below.

As a general overview for someone who says they want to home sew, I would suggest the following (I may break up into blogs for length);

The first thing I would tell a beginner is to relax. When you decide to sew you can get very excited as well as overwhelmed. Slow down and don't' take on more than you can handle. Find the beginner tutorials on YouTube and get a good book.

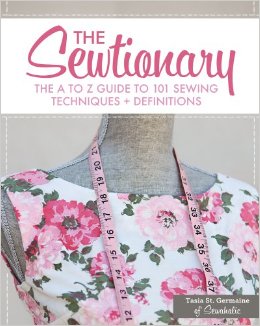
I reference "The Sewtionary" by Tasia St. Germaine from Sewaholic. The link will take you to Sewaholics page. It's an a-z guild of sewing terminology and how-tos with color photos and easy to understand explanations.

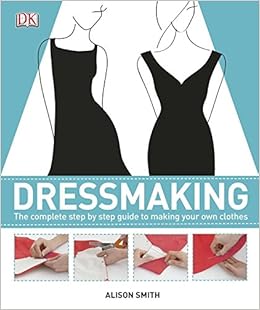
Another good book is "Dressmaking, a complete guide to making your own clothes" by Alison Smith. The link will take you to an amazon retailer. This covers everything from equipment to materials, techniques for fitting and some follow along patterns. Again, it has color photos and easy to understand explanations. These are great references for any newbie, but even after a year I still use them.

The next thing I would tell a beginner is to make sure the projects they want to do are appropriate for their skill level. I didn't know for the longest time that patterns usually have a difficulty rating on them. Some are more obvious than others. If you look through a Vogue pattern catalog they even have a whole section dedicated to "Vogue Easy" without sacrificing style, and there are also Vogue Very Easy patterns. Love it! So make sure you are sticking to something within your skill range.

The third thing I would mention is to get those coupons!!! I live near a JoAnns, Michaels, and Hobby Lobby who take each other's coupons, so get those apps, get on that mailing list. They have 50% off items, 60% off items, 20% off total orders and so on. You can use those for craft supplies, notions, fabric, and equipment. Coupons can't be used on Patterns, but those babies go on sale all the time. When simplicity has their $0.99 each pattern I stock up! Butterrick and McCalls also have something like $1.99 each, or 3 for $5 and Vogue will go on sale for $4.99 each. May vary by area. Also use the internet to hunt down cute patterns.

There is so much more I want to tell you but I am going to break this up. Next, I'll talk about the must have equipment, understanding patterns, choosing sizing and making mock-ups.

Hope you enjoy,

Jessi Harm aka Evil Regal

Friday, September 16, 2016

Halloween "Costume; 1930/40s Evening Gown

   
     So I have been thinking about what I want to do for my costume this year, and I am hosting a Halloween party on the 8th so I wanted to do something special. Originally I wanted to throw a masquerade-style party, but space and funds are limited for that, so I went simple and decided to do a pattern I bought over a year ago, its one of the first ones I ever bought, "Archive Collection Circa 1930" evening gown by McCalls. I have been dreaming of this for a while but have been too terrified to make it. I even bought a second pattern envelope in case something gets damaged since it was on sale.

Disclaimer: This is not just a costume. Any chance I get, I am wearing this.

     What I really love is the seams on the dress. I love how it drapes but is also tailored in the right places. I am going to be very careful with fitting and sewing because I want this to be near perfect. I found some lovely versions on Instagram and google, but you can see very quickly any errors made in these particular seams. I am nervous on how it will lay because I am an apple shape so I have been thinking of getting a set of appropriate foundations to wear under and basing my measurements and fitting with the foundations.

   
     The Fabric I chose is Crepe Back Satin, and I decided to do an emerald green after I saw Kiera Knightley's green gown in the movie Atonement. I thought the deep emerald green would also allow for some old Hollywood glamor, and bring in some of the 1940s which I love. This fabric also has some texture to it, so I think it will really show off those unique seams as well and do fabulous light play.

   
There are a few changes I am going to be doing.

First is a full bust adjustment. Needs to be done. The second is because I am so large in the chest I don't want the open in the back because I need to wear support, so what I want to do is some of the pretty cloth covered buttons and little button loops. This is new for me, so I am sure that I will say lots of naughty words.


I will keep you in the loop as I go step by step, and let you know of any changes, issues or concerns I have.

Make sure to check out my Instagram account for pictures of other fun finds and adventures.

Jessi Harm
Evil Regal

Friday, June 17, 2016

Summer Floral Flare

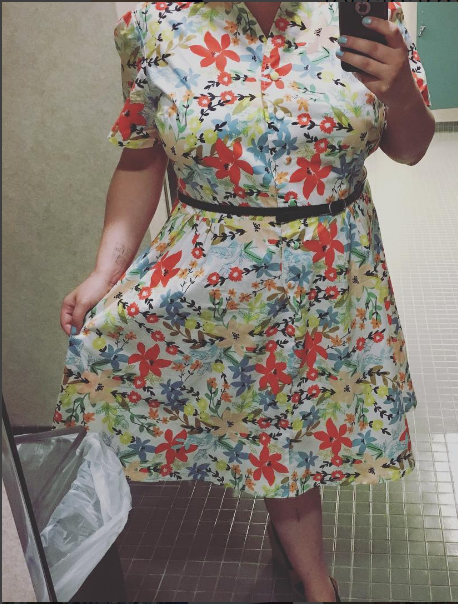
I recently got this very awesome Retro Butterick 1951 shirt-dress pattern in B5920 and had so much fun making it. Now I am a super beginner, and this is my first dress. I found it to be pretty easy to follow along with, however, you will notice the lack of the notched collar because I couldn't figure it out. I also ended up taking off a lot of length from the skirt compared to the original pattern. I am 5'5 and I like skirts and dresses typically right below my knee. This first picture was my finished piece. Again, room for improvements, but I really like this style. More shirt dresses to come. 


(again with that garbage pail)


SMALL
This is the dress still on my dress form with the tailor marks and original length. I wanted you to see the cloth buttons. I went to a vintage store and found a bunch of buttons, however, didn't like any of them and ended up getting a cloth button making kit to do my own out of the leftover fabric. 

 The only thing I want to do is find thicker, funkier belt to really cinch the waist. :)

Hope you enjoyed, 

Comment below, 

Jessi Harm

Tuesday, January 28, 2014

Fitness for Starters. Weights, Reps, and Sets.

So I've been doing lots of research to make sure I presented general but accurate information to you about basic fitness terminology, as well as picking a weight, and understanding sets. These are things I didn't know or understand as a beginner, which would have helped me a great deal.

 Especially for those of us who can’t afford a gym, and have to do and figure this out on our own.

Let us start by talking about picking your weight. There are so many benefits of using weights for men and women. A huge misconception is that they are only for men, or only for building muscle. This is not completely accurate. Doing weight training increases metabolism, which means burning more calories, which means shredding more fat. It’s all about knowing how to use them. The ranges are:

Building bigger muscles: 4-10 repetitions. Toning, losing fat: 8-15 repetitions.

Obviously, these are huge gaps, so this depends on you, your weight and your sets. A lot of premade online workouts will tell you how many to do.
The rules of thumb with weight is ‘Pick the heaviest weight that allows you to complete all the required repetitions.” So if you are doing 15 dumbbell presses, pick a weight that allows you to complete all sets of 15 repetitions, without sacrificing form. It should be challenging, but not impossible.


     So choosing how many sets you should do, depends on your repetitions. You should do enough sets to complete a total of 25-30 repetitions per muscle group. So if you are doing 15 repetitions of dumbbell presses, you would complete 2 sets. (Or more, if you are at that level.) A set is just a reference to the muscle group and how many times that muscle group was worked. So if you did 15 squats three separate times, you did three sets of squats.
Alternating sets are when you do a set than rest and do a set that works the opposite muscle group. Choosing rest between sets depends on your repetitions.  For 4-8 repetitions, rest 2-3 minutes, for 8-12 repetitions, rest 1-2 minutes, and for 12+ repetitions, rest 30 seconds to 1 minute.

A circuit is when you do three or more exercises in succession without resting between sets. Usually alternating between upper and lower body. As an example, you could do push-ups, squats, barbell press, and hip raises, so the upper body rest while the lower is being worked. Sometimes transitioning from one move to the next with little to not rest in-between, then taking a break at the end of the circuit before you did it again. Usually a circuit is done at least two times threw. Go back to when I talked about picking your number of sets. You do as many sets as it takes to get at least 25 repetitions per muscle group. So if you are doing 12-15 repetitions, you need to do at least two sets, so you would perform the whole circuit at least two times through. Circuit training is a popular way to train for those who want a high intensity interval workout.

                So the biggest suggestion when using weights is lowering the weight slowly and controlled, and then quickly raising it up. So for rows, presses, curls etc. You can apply this method to all your movements, such as push-ups, squats, lunges, hips raises (aka hip bridges), and so on. Slowly lowering helps you build strength faster, and the sudden quick raising movement activates more muscle fibers. The only exception to this rule is explosive movements like squat jumps, or alternative lunge jumps etc. where the whole movement is quick and explosive. On a side note, there are many different ways to hold your equipment, especially dumbbells. Do what feels natural, but I suggest you look it up, and see how variations in holding can effect and change how the muscle is being worked.

     It’s important to maintain balance in your body. So when you train, make sure you work the opposite muscle group. If you do chest, make sure you do upper back, pair bicep and triceps, quads with glutes and hamstrings, etc. If you don’t maintain balance, you will have a strong chest, but weak upper back, effecting things like your posture. So if you are writing your own circuits, or finding circuits on websites like Pinterest, make sure they have a balance, or adjust accordingly. A book I would suggest that shows muscle groups, moves, and variations, as well as equipment alternatives that I reference on a daily basis is “The Women’s Health Big Book of Exercises” (they also have a mens health version.)

Last but not least, as a beginner, there are so many moves available per muscle group, and almost all of them have a body weight alternative available. You don’t need to go out and buy a whole gym, if you can’t afford equipment, there are still no excuses because of all the body weight versions out there. However, if at any point you are able to get equipment the two I would add in order of importance, (in my opinion) would be dumbbells, and then a barbell and weight plates. With those two items, there are easily hundreds of moves and variations available to you. I would also at some point add a Swiss ball, but not a high priority. There are standing, sitting and lying variations on so many moves that if you have a chair, floor, or your own two feet you will be okay.

Make sure you drink lots of water and listen to your body.

Yours truly,

Jessi
Saturday, December 1, 2012

Perfect nails everytime!

I was getting so tired of painting my nails, and smearing them before they dried, them chipping by the next day, or them looking dull, and the paint not going on even. So I found some great and helpful links and I am going to show you how to make perfect nails every time!

First things first: 

BASE COAT: this made the biggest difference. This alone made a drastic improvement It helps the polish stay in place, it provides an even primed surface for the polish to go on and stick too.

NAIL POLISH: The base coat will help your polish stay, but another thing to consider is getting a decent polish. the 99 cent polishes really don't cut it. If you can, get a nice name brand polish, it makes a big difference. Don't have to spend a lot of money, but don't get the cheapest stuff you can find.

ALSO: make sure your nail polish isn't old or expired. Polish typically has a shelf life of 2 years or less. So it's important to keep up with it. Over time the bottle dries out, and colors separate making it undesirable to use when trying to achieve beautiful nails.

Make sure you have all your tools out and ready to discourage you from bumping or smearing before they dry. Also try to do your nails when you have a few minutes to sit down and spend time on them, as well as giving them time to dry.

WHAT YOU NEED:

-Base coat
-color polish
-nail clippers
-emery board/ nail file
-buffing pad (optional) 
-cuticle pusher/cuticle trimmer (optional)
-nail polish remover (to remove old polish and clean up after)
-cotton balls (optional, for removing old polish)
-Small paint or makeup brush (for clean up)

Step one: Set up your station, with your supplies in reach. Remove all leftover polish and wash your hands. Focus especially on your nails and cuticles to remove and particles, dirt and excess oils.

Step two: Push down and trim your cuticles if needed, then clip your nails to a desirable even length, file if necessary, and buff away any rough edges, and smooth down the surfaces. Wash and dry hands again if you want.

Step three: Apply your base coat. One layer should be okay, just make sure its even. Follow base coat and color applications shown in the picture below.

So the first link is to show you how to properly and evenly apply the polishes. Base and color. I usually do one coat on all fingers before I go back and start the second and third coat. Three coats are usually good.


The next link is how to clean up you nails after you get the polish done. Get yourself a very small paint or makeup brush, and dip it in remover and wipe around edges and any mistakes. 


Here is the link to her blog where she has a wonder manicure tutorial herself

Other tricks people have mentioned is putting a jelly or ointment around the edges of the nails so any polish won't dry on the skin and it is very easy to clean up after. I have also heard about putting tape around the edges also. Hope it helps.


I hope you enjoy these tips and tricks, and if you have any more please let me know.
Have a wonderful weekend, 
Jessi Harms